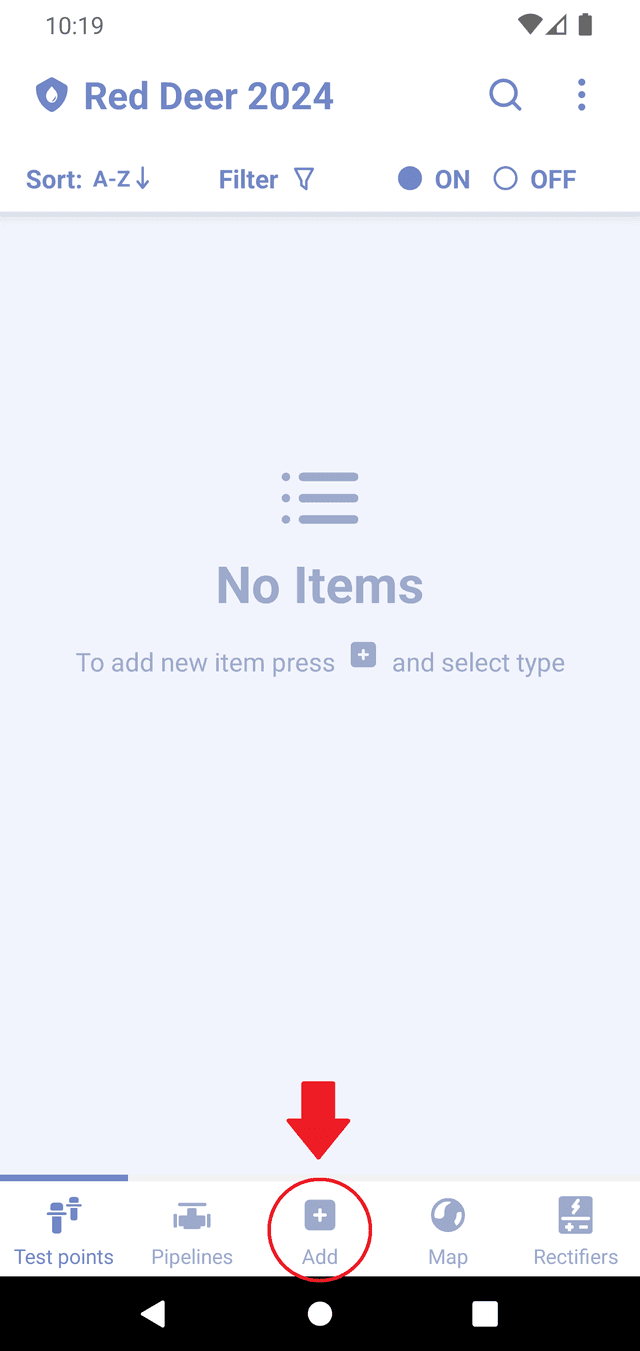
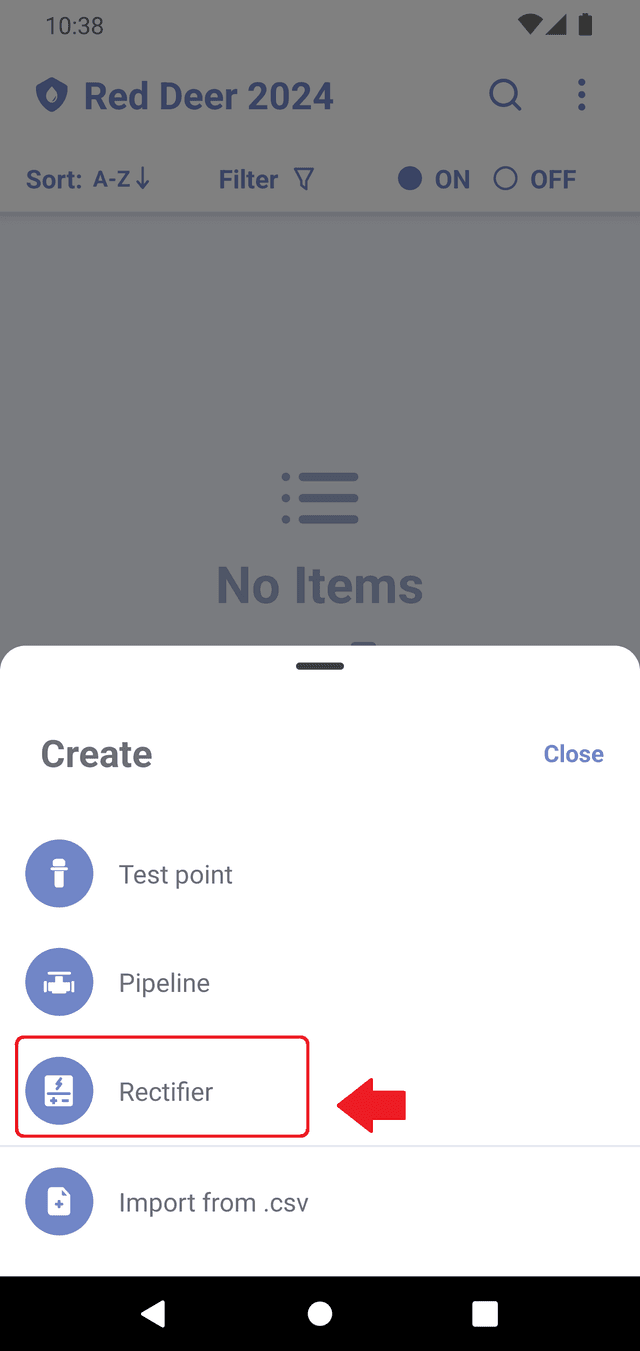
Creating rectifiers
To create a rectifier in the survey, press the "Add" tab at the bottom of the screen and select "Rectifier".
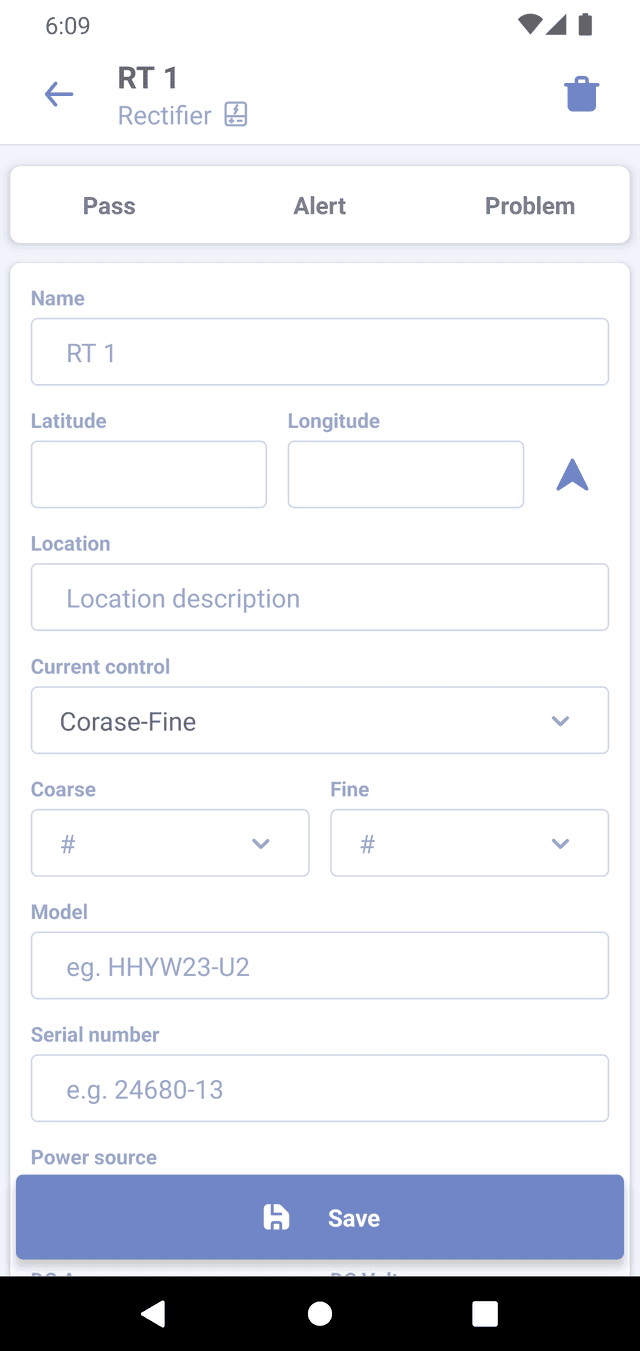
Rectifier properties
Each rectifier has following properties:
-
Status - there are three available statuses: 'Pass', 'Alert', and 'Problem'. Only one status can be assigned at the time and the user decides what status should be assigned. There are no automatic assignments based on any criteria. When no status selected, 'Unchecked' status applied.
-
Name - the name of the rectifier. If left blank, a default name with an index will be automatically assigned. See Default names for more details.
-
Latitude/Longitude - the GPS coordinates of the rectifier in decimal format. You can press the arrow button next to the field to capture your current coordinates using the phone's GPS receiver.
-
Location - text field that describes the location of the rectifier.
-
Current control - the property allows to select one of three types of how this rectifier controls current output:
- Coarse-Fine - Using transformer taps. When selected, there will be an option to select coarse and fine tap values.
- VA % - Variable resistor - Rectifier uses a resistor to control output. When selected, there will be an option to select the percentage value of max current output.
- Auto - Can be used for current/potential-controlled rectifiers.
Current control is optional; you can leave it blank. Feel free to reach out and recommend more options for this property.
-
Model - rectifier model.
-
Serial number - rectifier serial number.
-
Power source - energy source from where rectifier uses power. Can be AC grid, TEG, Wind turbine or Solar
-
DC amps - maximum DC output current for the rectifier.
-
DC volts - maximum DC output voltage of the rectifier.
-
Comments - any additional notes related to the rectifier.
-
Images - the users can attach an existing image to the rectifier or capture a new photo with your camera.