Displaying survey items
After creating a new test point, pipeline, or rectifier, or accessing them from the list or the map, you will be directed to the 'View' screen. This screen displays all the properties of the item and provides a quick way to edit some values, such as potentials, voltage drop and current.
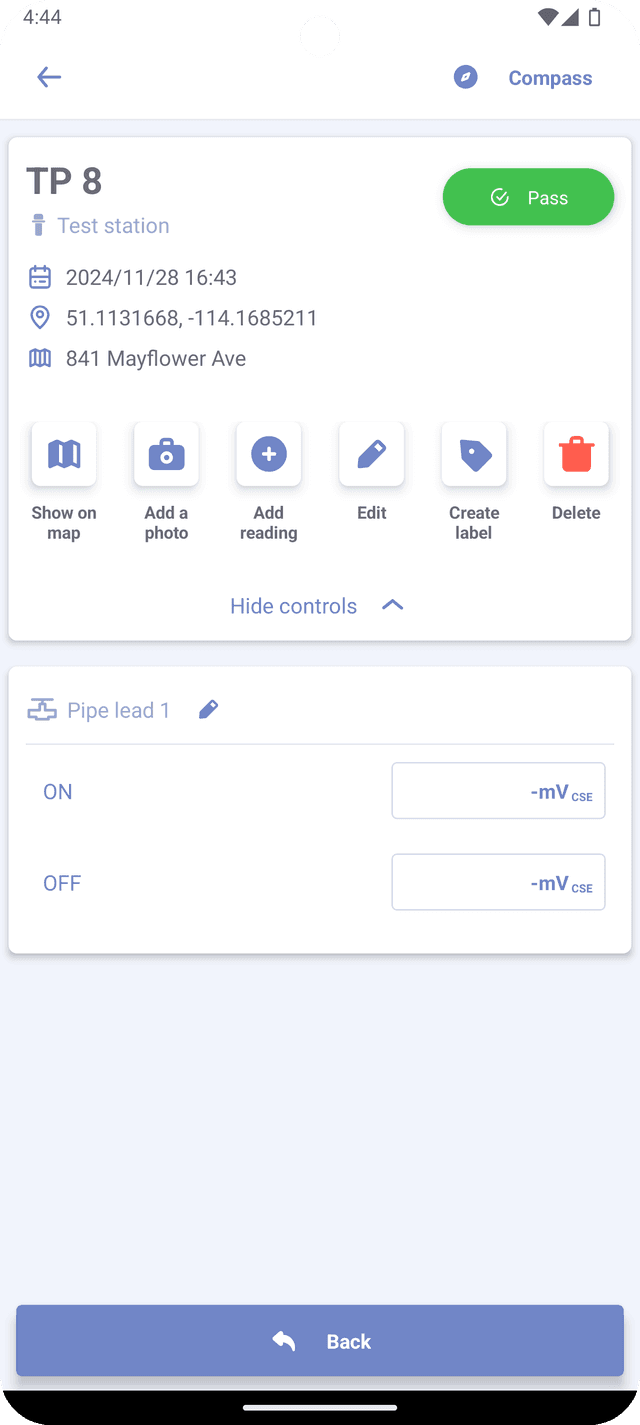
To change status of your test point or rectifier on the 'View' screen, simply tap the status button once to shift to the next status. Long pressing the status button will reset it to the "Unchecked" status.
Compass
The Compass feature utilizes the phone's GPS and orientation sensors to determine the direction and distance between the device and the survey item (test point or rectifier). To access this feature, tap the compass icon located in the top right corner of the View screen.

The arrow will indicate the direction towards the point, while the labels display bearings in degrees and cardinal directions between you and the survey item. This feature is available only if your device has gyroscope, accelerometer and magnetic sensors.
Compass icon is only visible, when both latitude and longitude are recorded for the item.
Controls
The View screen features a control panel accessible by tapping the "Show controls" button. Here are some of the options available in the control panel:
- Show on map - (For test points or rectifiers only) If the item has latitude and longitude, this option will display the map and select the item.
- Add a photo - (For test points and rectifiers only) This option allows the user to attach images to the survey item.
- Add reading - (For test points and rectifiers only) This option allows the user to add extra readings to the item, similar to the "Add reading" button in the Edit screen.
- Edit - This option opens the Edit screen, where you can modify all the previously recorded properties.
- Create label- (For test points or rectifiers only) - This option allows to write item information to the NFC tag or generate a QR code.
- Delete - This option allows the user to permanently delete the item.
Unlike when editing properties in the Edit screen, changes made on the View screen are automatically saved to the database.