Import
To quicky populate survey with the data, you can import information from a spreadsheet file.
- Create new survey if you don't have one already.
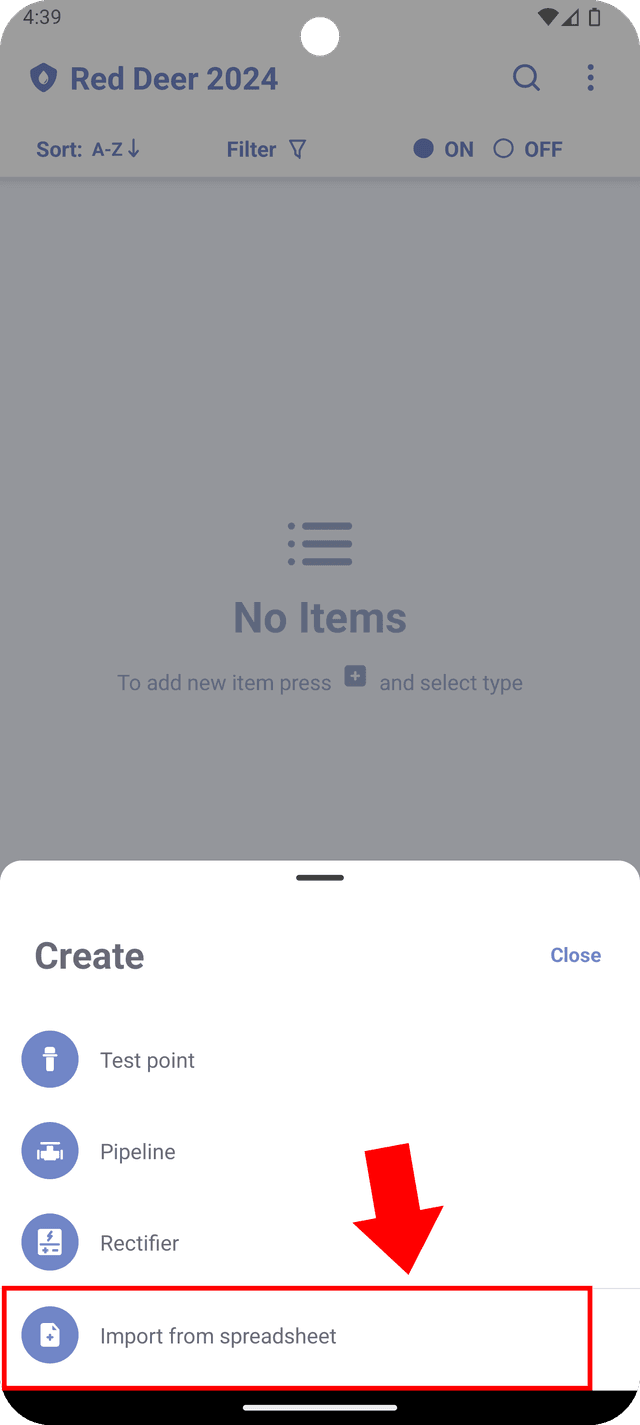
- Navigate to the bottom of the screen and tap on the "Add" button.
- From the options that appear, select "Import from spreadsheet".
You will be re-directed to the screen where you can select a file and map columns of the file to survey item properties.
Selecting "Import survey from .csv" in the survey list screen functions similarly to creating a blank survey and initiating the data import process afterward.
Selecting a file
Select and item type ('Test Point', 'Rectifier' or 'Pipeline') that you wish to import. Only one type can be imported at once.
Before importing test points, make sure that your survey has all the pipelines and potential types that you would want to be assigned.
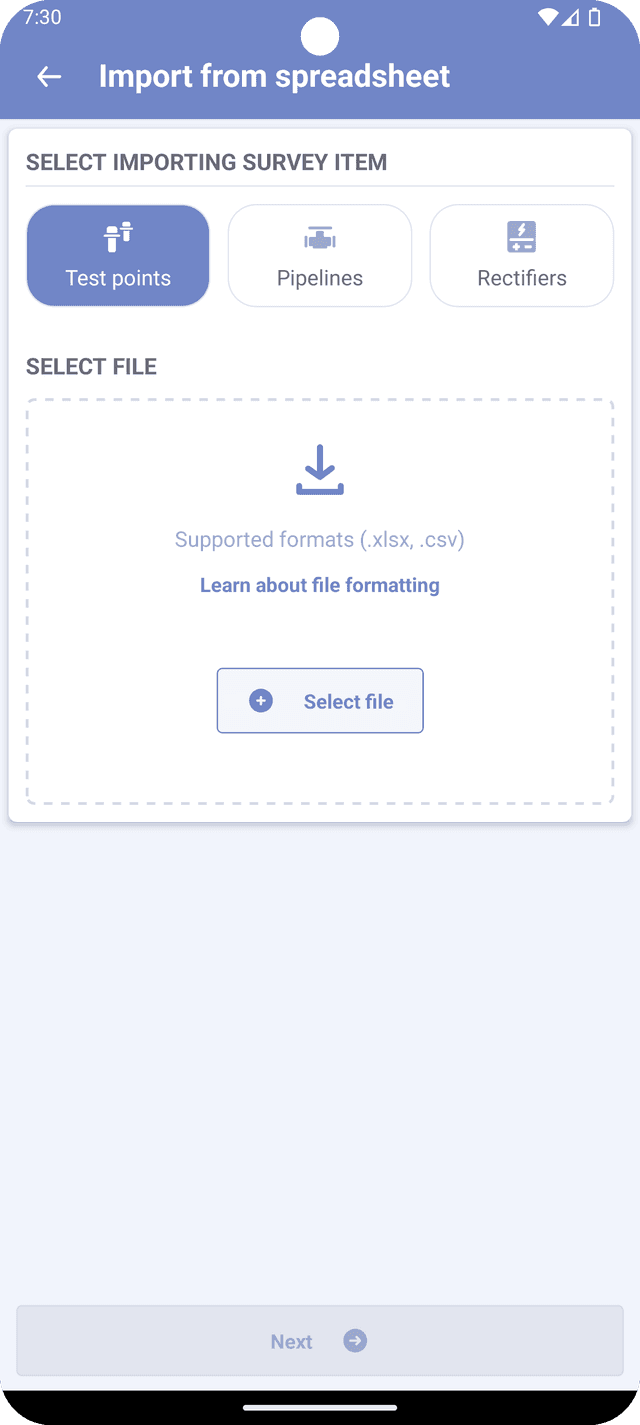
Once you've selected the item type, click on the "Select file" button. This action will open the system file picker, allowing you to locate the spreadsheet file you want to import.
Your file should adhere to common spreadsheet formats, using UTF-8 encoding with commas as delimiter characters.
Supported file formtas are .xlsx and .csv. File must be less than 3MB.
The first row of the file will be treated as headers for the data. If the first row contains empty cells, the system will generate default column names.
Avoid using special characters in the first row, as this could lead to errors during the import process, preventing the file from being imported properly.
There is no limit on how many rows could be imported from a single file. 3MB limit allows to create survey files with thousand of items, however such surveys could impact the perfomance on older devices.
Import parameters
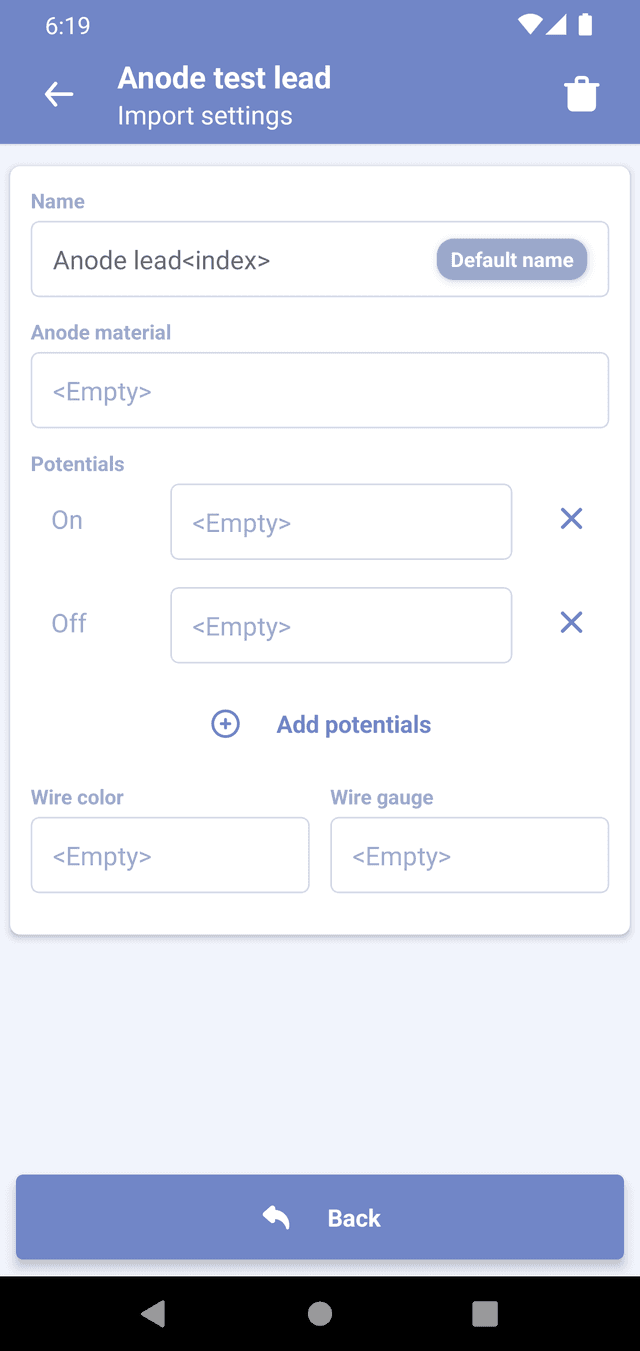
Setting up item properties involves matching the properties of items with columns in your spreadsheet file. On the main screen, you'll find property fields where you can set parameters for how these properties will be assigned a value. Here are the available options:
- <Empty> - this options means that all created items will have selected property left blank.
- Fixed value - with this option, all created items will have a selected value assigned to this property, regardless of the item's index.
- Default name - this option is only applicable for the name property. It means that the name property for each individual item will be assigned as a combination of the default name (see Default names) and the index of the item in the spreadsheet.
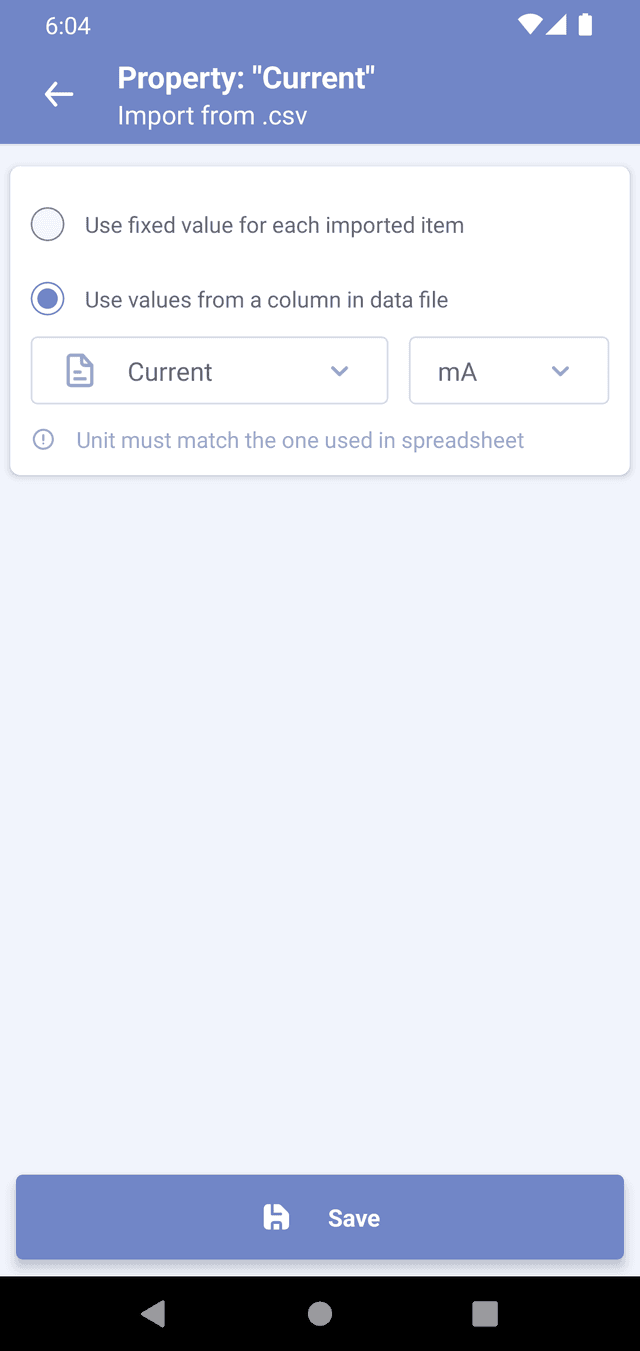
- Field value - displayed with the label "field:" followed by the name of the selected field. This means that values for this property will be taken from selected column in the spreadsheet. You can view the values of that column by pressing the "Text File Button" on the left side of the field.
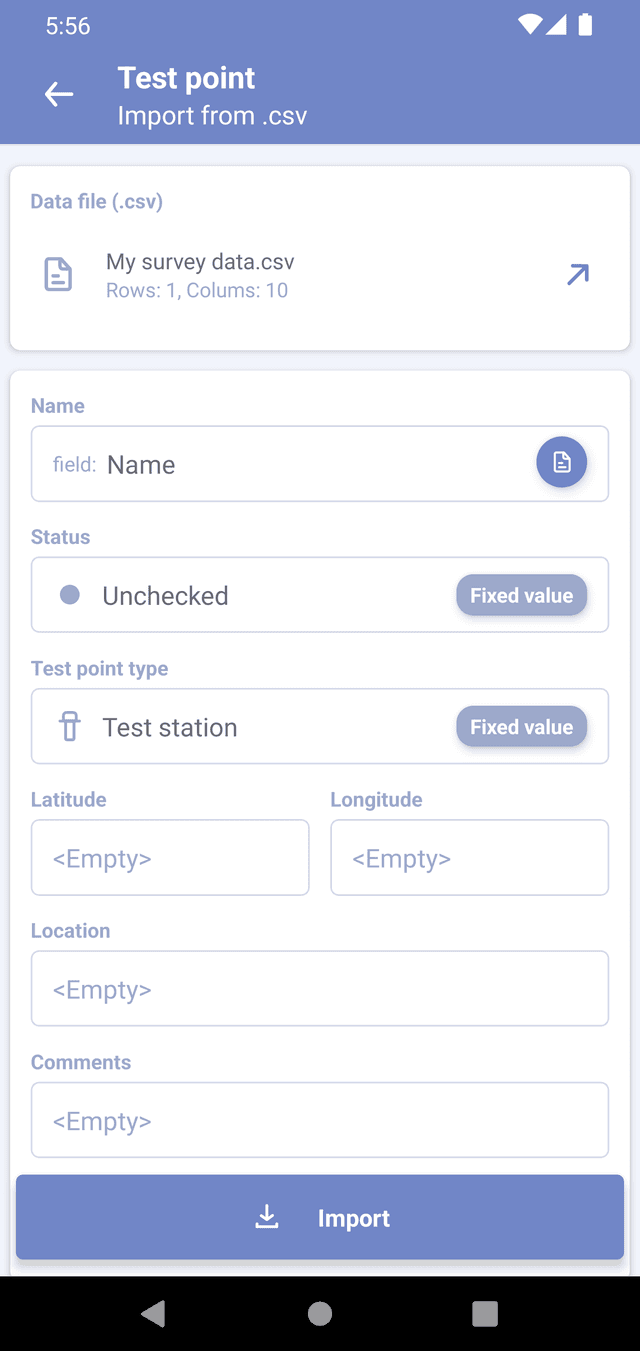
If some values in a spreadsheet have incorrect types (such as text instead of a number, or names with invalid symbols), empty values will be assigned whenever possible. However, if an empty value cannot be assigned (for example, in the case of the name property), then the item will be skipped.
Selecting import parameters for a property
To select the import parameters, simply press on the property that you would like to modify, which will prompt a parameter screen to appear.
In this parameter screen, you will find a list of options to select from:
-
Use fixed value - when this option is selected, you need to type the fixed value that you want to assign, or select it from a list of predefined values.
-
Use values from a column in the data file - selecting this option allows you to choose a column name from your spreadsheet file. The values from this selected column will be used for generated survey items.
-
Use default name - this option assigns the default name of an item or reading to the property. You can select an index that will be assigned to the first generated item. Used only for the name property.
-
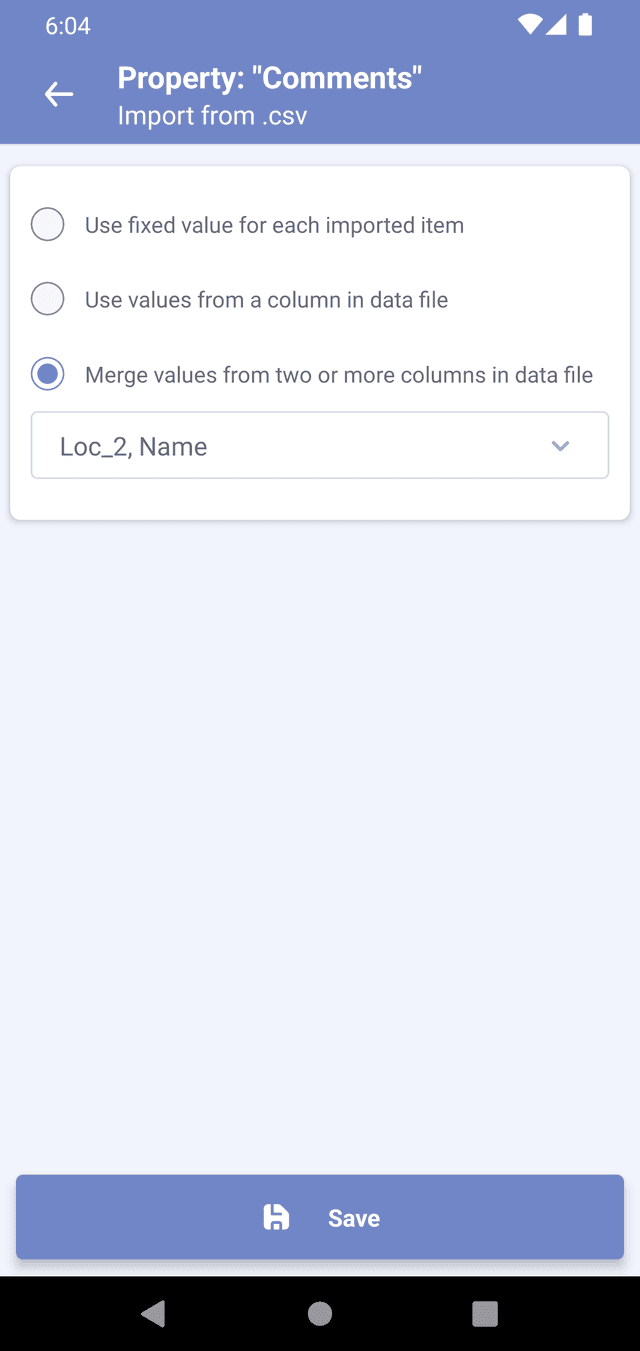
Merge values from two or more columns - this option is only available for some properties. When selected, it combines values from multiple columns and assigns them to the property.
For properties such as potentials, current, etc., you should also select a unit when importing them from the spreadsheet. Ensure that you select the appropriate unit that is used in the spreadsheet. This step is necessary for Corpad to accurately convert these values for its internal database.
Attribute mapping
Attribute mapping is a useful feature designed to facilitate the import process, when dealing with pre-defined values in the Corpad app. Here's how attribute mapping works:
Example
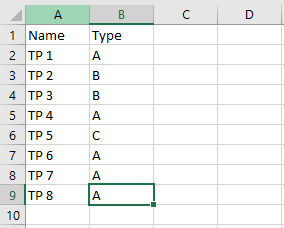
Let's say you have a spreadsheet containing test points, with two columns: 'Name' and 'Type'. In the 'Type' column, you have values A, B, and C, where A and B represent different types of test stations, and C represents a header.
Attribute Mapping Process:
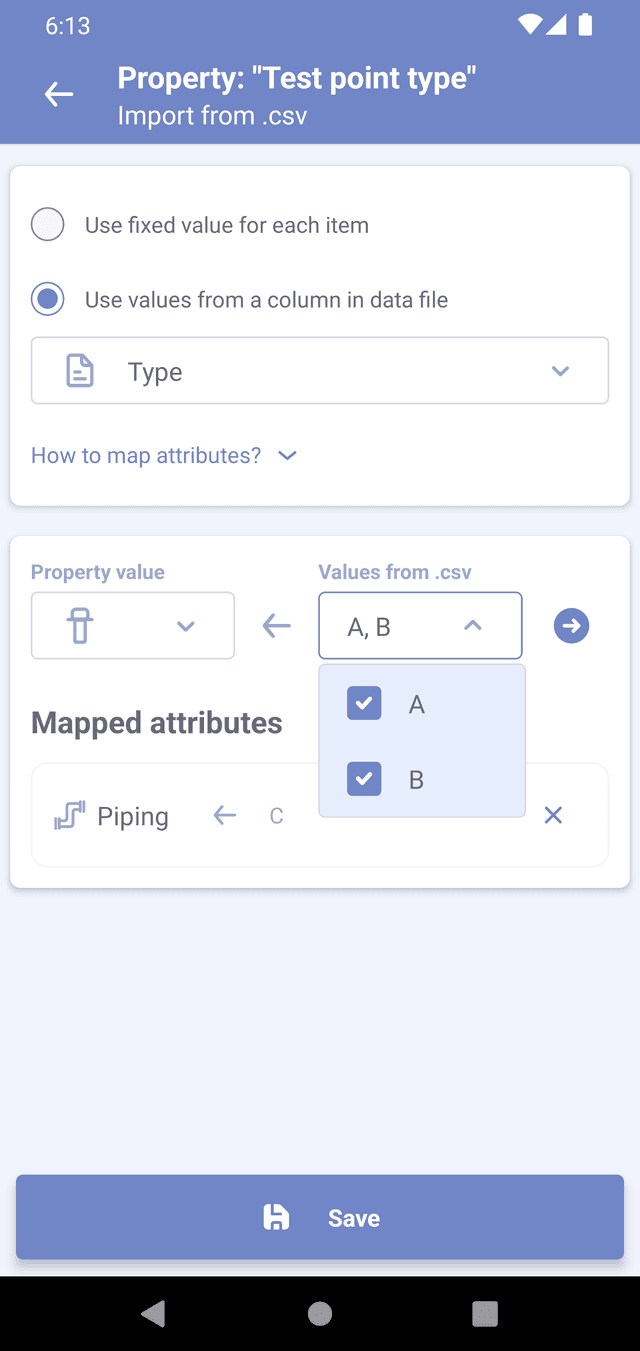
- When importing the spreadsheet, select the 'Test point type' property.
- Choose the option 'Use values from a column in the data file' and select the 'Type' column.
- At the bottom part of the screen, you'll find the attribute mapping section.
- Select the property value 'Test Station' from the Corpad app.
- From the list of 'Values from spreadsheet', select values A and B.
- Press the arrow button to add the new attribute mapping to the list.

Outcome:
Now, when a new test point is created, Corpad will examine the values in the 'Type' column. If the value in the column matches A or B, Corpad will automatically assign the value 'Test Station' to the test point type property for that item.
By using attribute mapping, you can ensure that the imported data aligns with the predefined values in Corpad, streamlining the import process and reducing manual effort.
Adding readings
Same as when creating an item, you can add readings to survey items and assign values from spreadsheet to the reading properties. When importing, the readings will be automatically created for every imported item. To read more about readings check how to create readings.
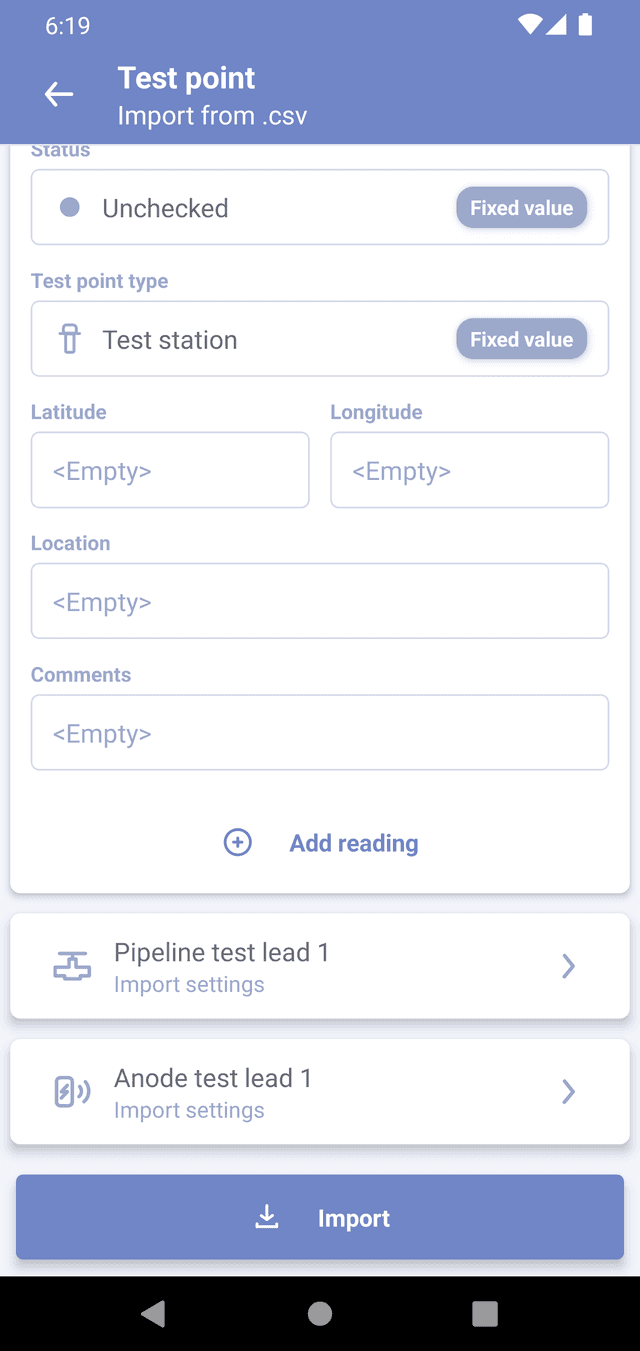
Certain reading types, such as Soil Resistivity Test and Anode Bed, are not available for import.
Starting import
After selecting all parameters, click on "Import" and then "Start". A modal will appear, displaying information about how many items were successfully created. If you want to see more detailed information about any errors or warnings encountered during the import process, click on "Details". To exit the import process and return to the survey list, click on "Go to List".

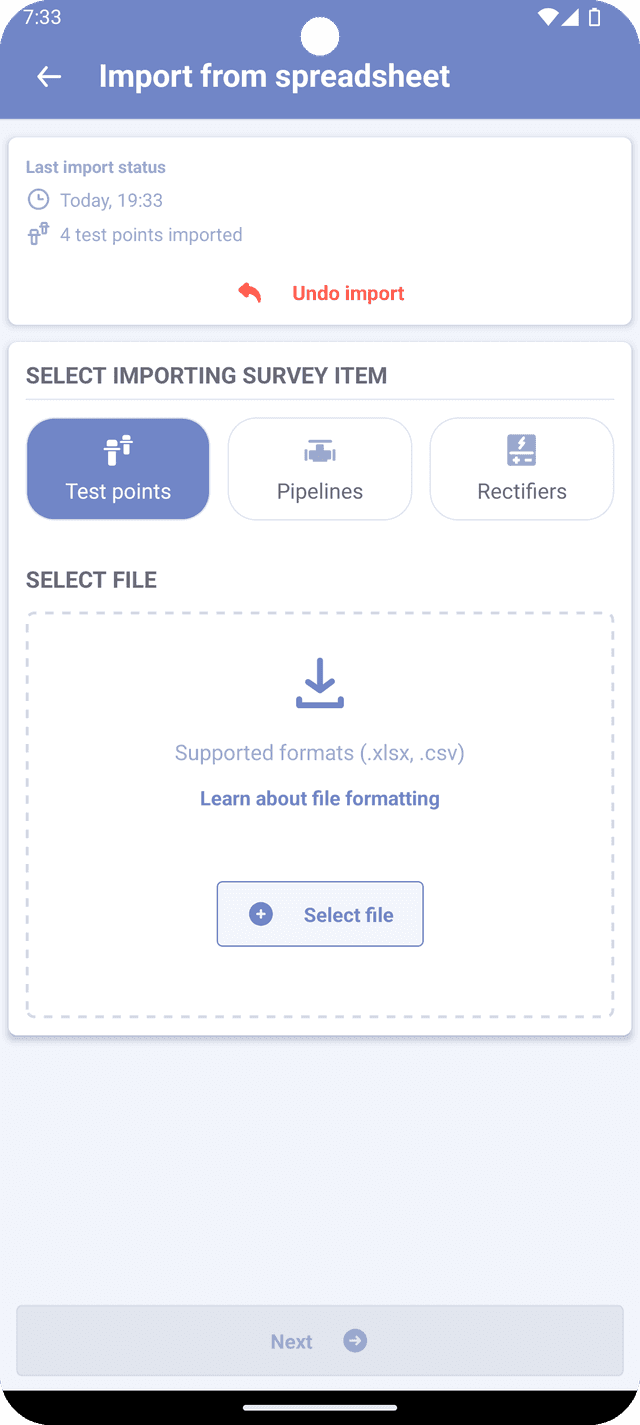
Undoing last import
If the import didn't yield the desired result, you have the option to cancel the recent import. This functionality is available immediately after the import process, but it won't be accessible if you navigate away from the survey where the items were imported. To undo the import, follow these steps:
- Tap on the "Add" button at the bottom of the screen.
- Select "Import from spreadsheet".
- You should see the status of the last import at the top of the screen.
- Press "Undo import", and all the imported items will be removed from the current survey.