Exporting spreadsheet and geodata files
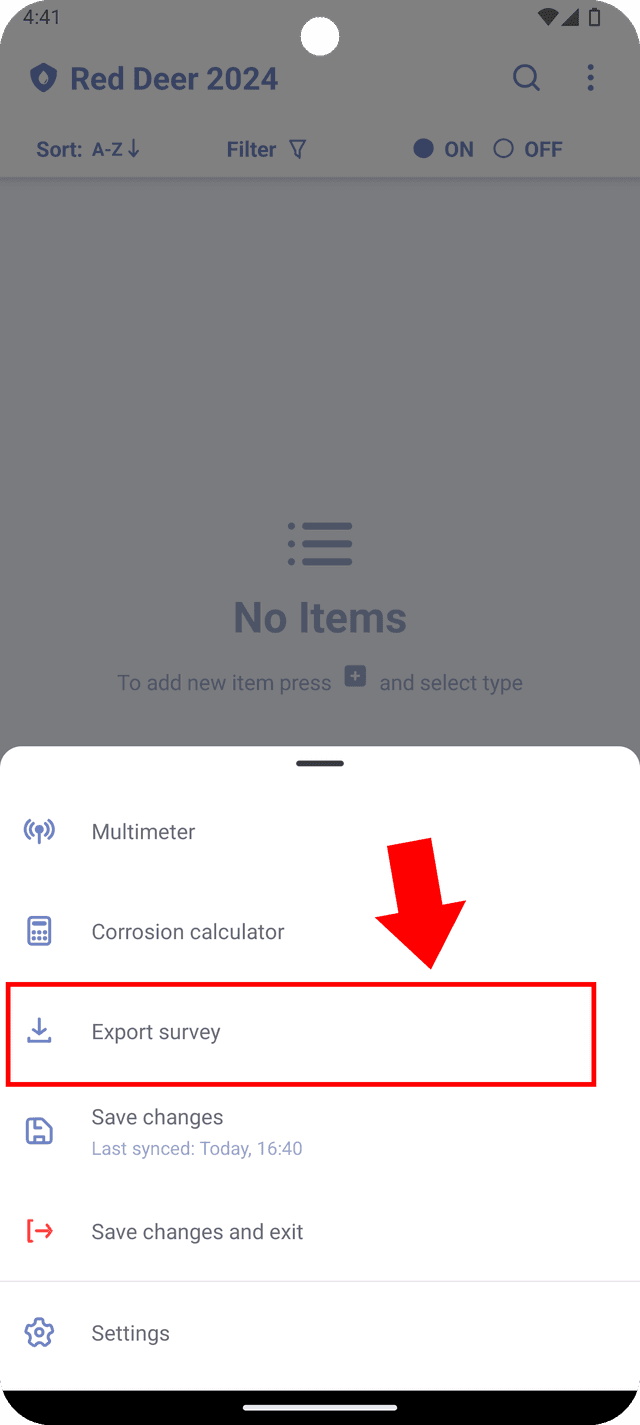
To export the survey as a spreadsheet file, open the survey menu and select the "Export survey" option. You will be taken to a screen where you can choose the parameters of the export.
When exporting to a spreadsheet, each row will correspond to a single test point or rectifier.
Item properties
When exporting, you will be presented with multiple screens where you can select export settings. "Item properties" screen allows to select properties of the survey item and output format of exported file.
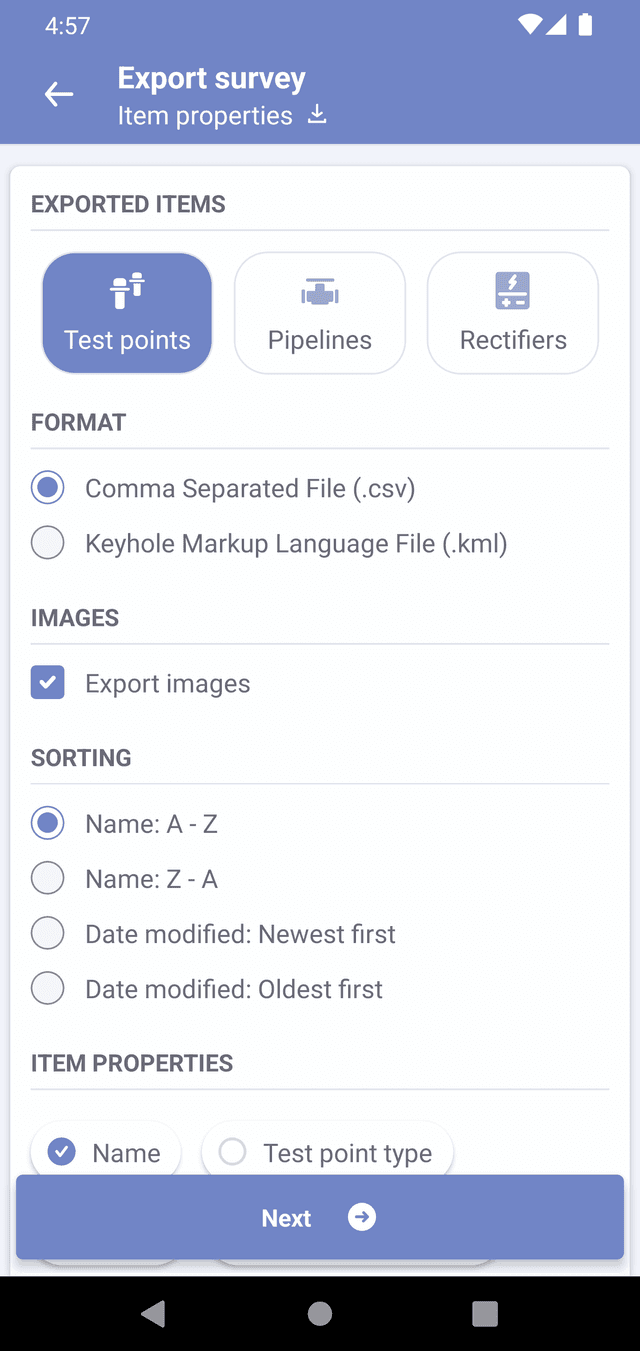
- Exported items - Under "Exported items", select the survey item type that you wish to export. Please note that you can only export items of one type at a time.
- Format - For test points and rectifiers, please select the format that you would like to use. There are two options available: .csv for spreadsheet format and .kml for geodata file format.
- Images - If you select to export images, the survey images will be exported to a .zip archive.
- Sorting - Items in the exported file can be sorted by name or by the date they were modified. Please select the appropriate option from this list.
- Item properties - Choose the item properties that you wish to export. Each property will be represented by a separate column in the spreadsheet.
Potential export (Test points only)
When exporting test points, you will have the option to export potential values of the readings associated with the test point. Ensure that the "Export potentials" checkbox is checked, and then select the parameters of the potentials that you wish to export.
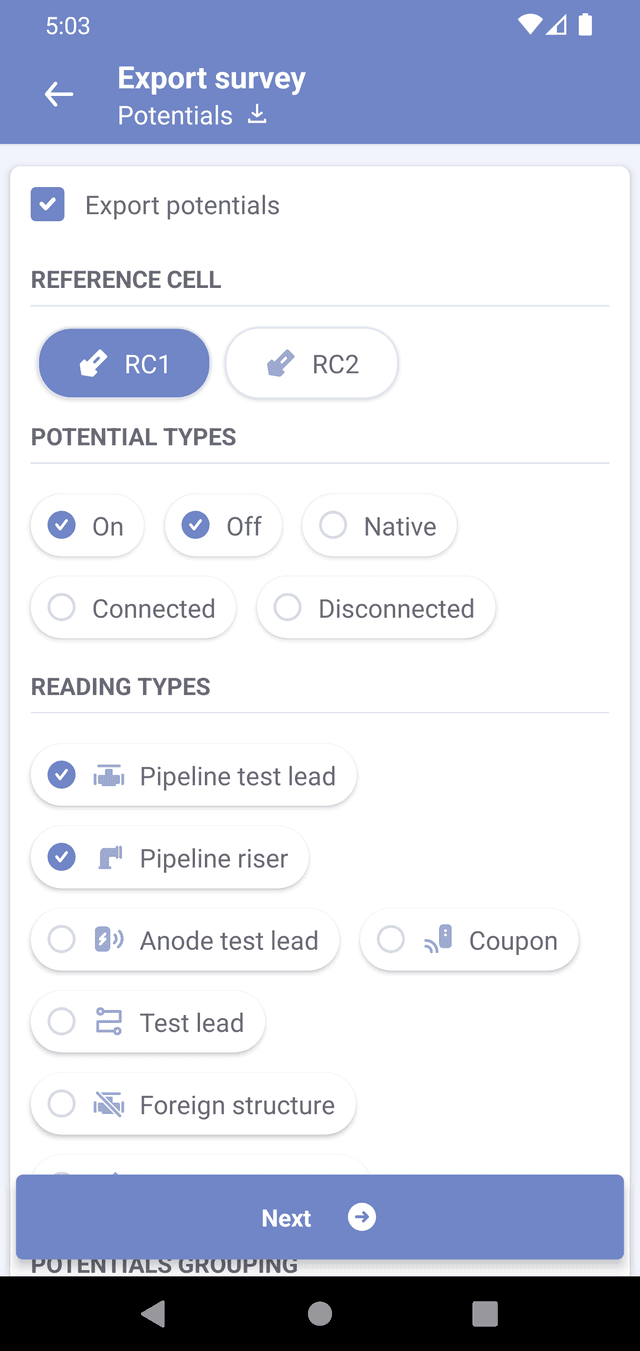
- Reference cells - If you have more than one reference cell, please select the reference cell that you wish to use when exporting potential values. Note that only one reference cell can be selected at a time. If you need to export values of potentials for different reference cells, you will have to repeat the process for each reference cell.
- Potential types - Select potential types that will appear in the exported file.
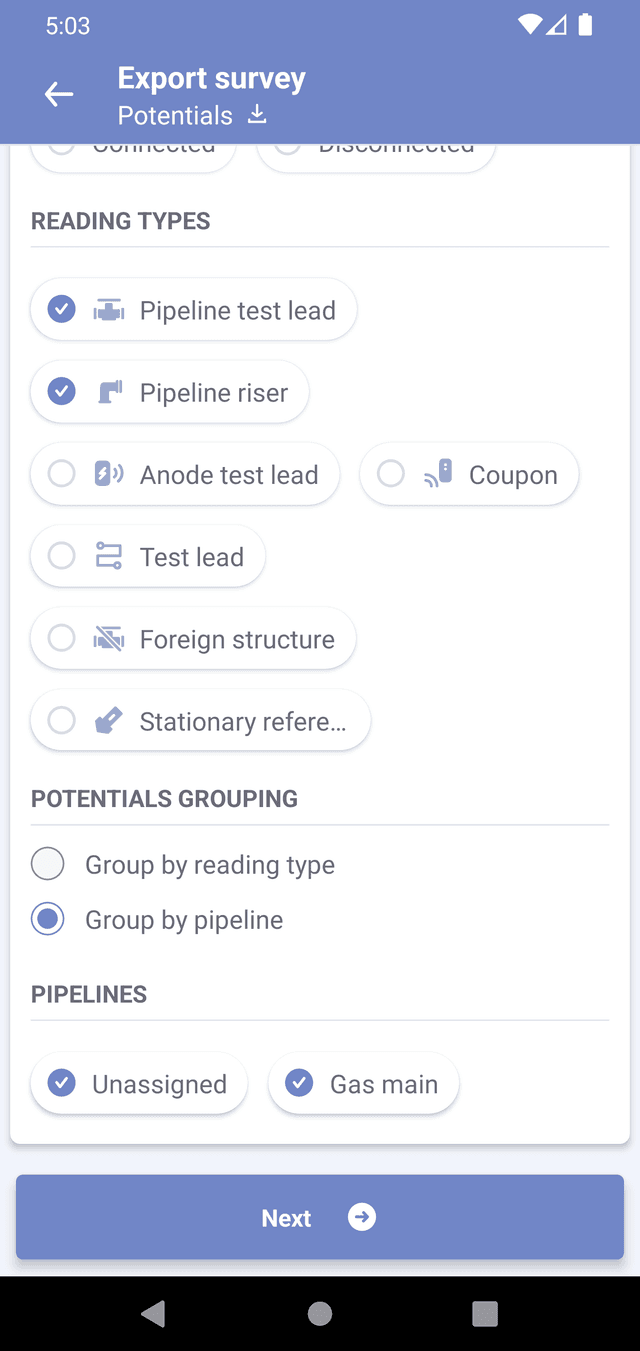
- Reading types - Select reading types of the potential values that you wish to be exported. If reading type is not selected, then potential value will not appear in the exported file, even if the reading has potentials of selected types.
EXAMPLE: You have a 'Test point' that has one 'Pipeline test lead' with ON/OFF potentials and one 'Anode test lead' with ON/OFF potentials. To see all four potentials in the exported list, you must select Ppipeline test lead' and 'Anode test lead' reading types. If you only want to see pipeline potentials, select only the 'Pipeline test lead' reading type.
Potentials grouping
Grouping is utilized when dealing with complex test point structures containing multiple readings. Grouping by reading type means that potential values assigned to the same reading type will be grouped together and displayed in the same column.
Grouping by pipeline allows to combine 'Pipeline test lead' and 'Riser' readings together, presenting them in the same column, as long as they are assigned to the same pipeline (pipe segment). When grouping by pipeline, you'll have the option to select the specific pipeline you wish to export. If pipeline was not selected, potentials of readings that assigned to this pipeline will not be exported.
An unassigned pipeline corresponds to situation, when 'Riser' or 'Pipeline test lead' readings have no assigned pipeline.
EXAMPLE: Let's consider two test points – TP1 and TP2. TP1 is a test station, while TP2 is a pipe header. TP1 has a 'Pipeline test lead' reading with ON/OFF potentials, while TP2 has a 'Riser' reading with ON/OFF potentials. When exporting these values and using reading type grouping, the resulting spreadsheet will have four potential columns: PIPE_TEST_LEAD_ON, PIPE_TEST_LEAD_OFF, RISER_ON, and RISER_OFF. However, if both 'Riser' and 'Pipeline test lead' are assigned to the same pipeline (e.g. pipeline named WATER_FEED), and pipeline grouping is selected, the exported file will only have two columns: WATER_FEED_ON and WATER_FEED_OFF.
Other properties
For test points and rectifiers you can also select other properties for export. Each selected property will add an extra column to the resulting file.


After selecting desired parameters, you will be prompted to the overview screen, where you can verify parameters that you had selected.
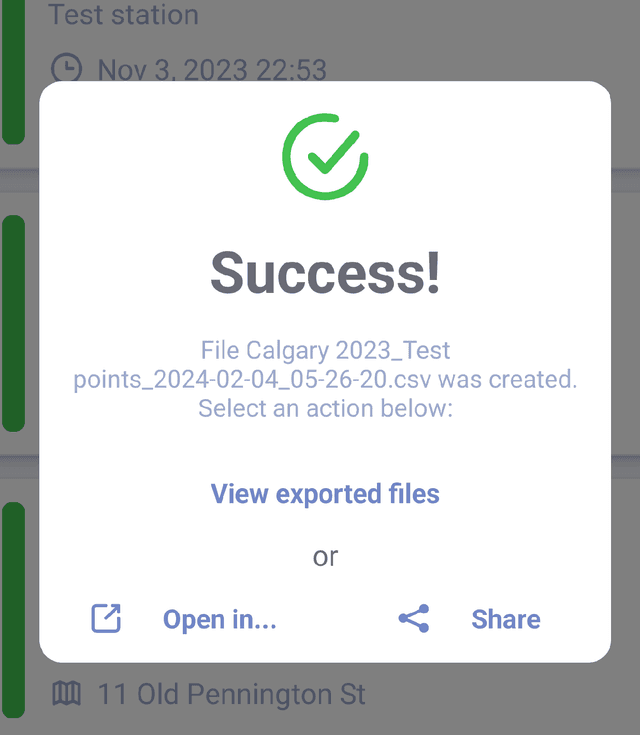
Press the "Export" button to initiate the exporting process. Please be patient as it may take up to a minute to generate the exported file. Once the export is completed, you will receive a prompt in a modal window, giving you the option to open the exported file in a third-party application. The exported file will also be saved on your device and can be accessed later via 'Settings'->'Exported files'.